This is our journal about our happy, little rural life... our daily adventures and mishaps as we live in this modern society, with all of its wonder & horror. We are g r o w i n g each day; learning to live happier lives, making c h a n g e s that will effect ours & our children's future.
Showing posts with label frugal. Show all posts

Friday, July 5, 2013

Wool- the Perfect Diaper, Day or Night

If you've ever had to deal with leaky diapers, especially during the night, you'll appreciate and possible fall in love with wool diaper covers.  Wool is such an amazing, natural solution for diapering that has been used on babies for centuries!  It seems odd that a natural fabric without any type of plastic or laminate can really be waterproof, but it is!  We have never experienced any leaks using wool.  It breaths very well, which helps prevent most of the overnight ammonia smell that can occur during the night hours.  Wool's breathable nature also makes it ideal for preventing diaper rash, or for times when baby is recovering from a rash.  The best thing about wool diapers is the luxuriously soft, fluffy baby bottom!  Seriously, wool must be grandma's best kept diapering secret!

I use cotton prefold or flat diapers attached with a Snappi fastener under the wool cover.  You can find wool covers in several styles.  Soakers are typically underwear shaped, just covering the diaper itself.  Shorties have longer legs, fitting like a pair of shorts.  Longies are basically wool pants, coming down to baby's ankles, which are nice for cooler months.  Additional clothing should not be worn on top of the wool, because the clothing will likely wick the moisture out.

The one thing that initially held me back from trying wool diapers was the washing process.  However, after trying it, I wish I had started using wool earlier.  It's really easy to wash wool and they only need to be washed once every 5 days or so!  When wool diapers start to smell a bit like ammonia or you feel a bit of dampness on the outside of the cover, it's time to wash.  If you have several covers to rotate, you'll really only need to wash once a month or so.

In a bowl of lukewarm water, mix about 1 Tbsp of wool shampoo and a pea-sized amount of lanolin.  Swish to melt the lanolin in the water.  Leave the diaper to soak in the water for a while, approximately 20 minutes.  I usually wash wool at bedtime, then leave them soaking overnight.  After soaking, gently squeeze the majority of water out of the diaper, and roll the diaper in a towel to eliminate even more water.  Lay flat to dry.  The lanolin boosts the waterproof quality.  Some wool shampoos come with lanolin already mixed in.  If there's solid waste on the diaper, do a quick pre-wash with just the shampoo, no lanolin or soaking.

Washing wool diapers is quite easy!
  I use Imse Vimse Wool Shampoo and Lansinoh HPA Lanolin (the same lanolin that's great for new nursing moms). 

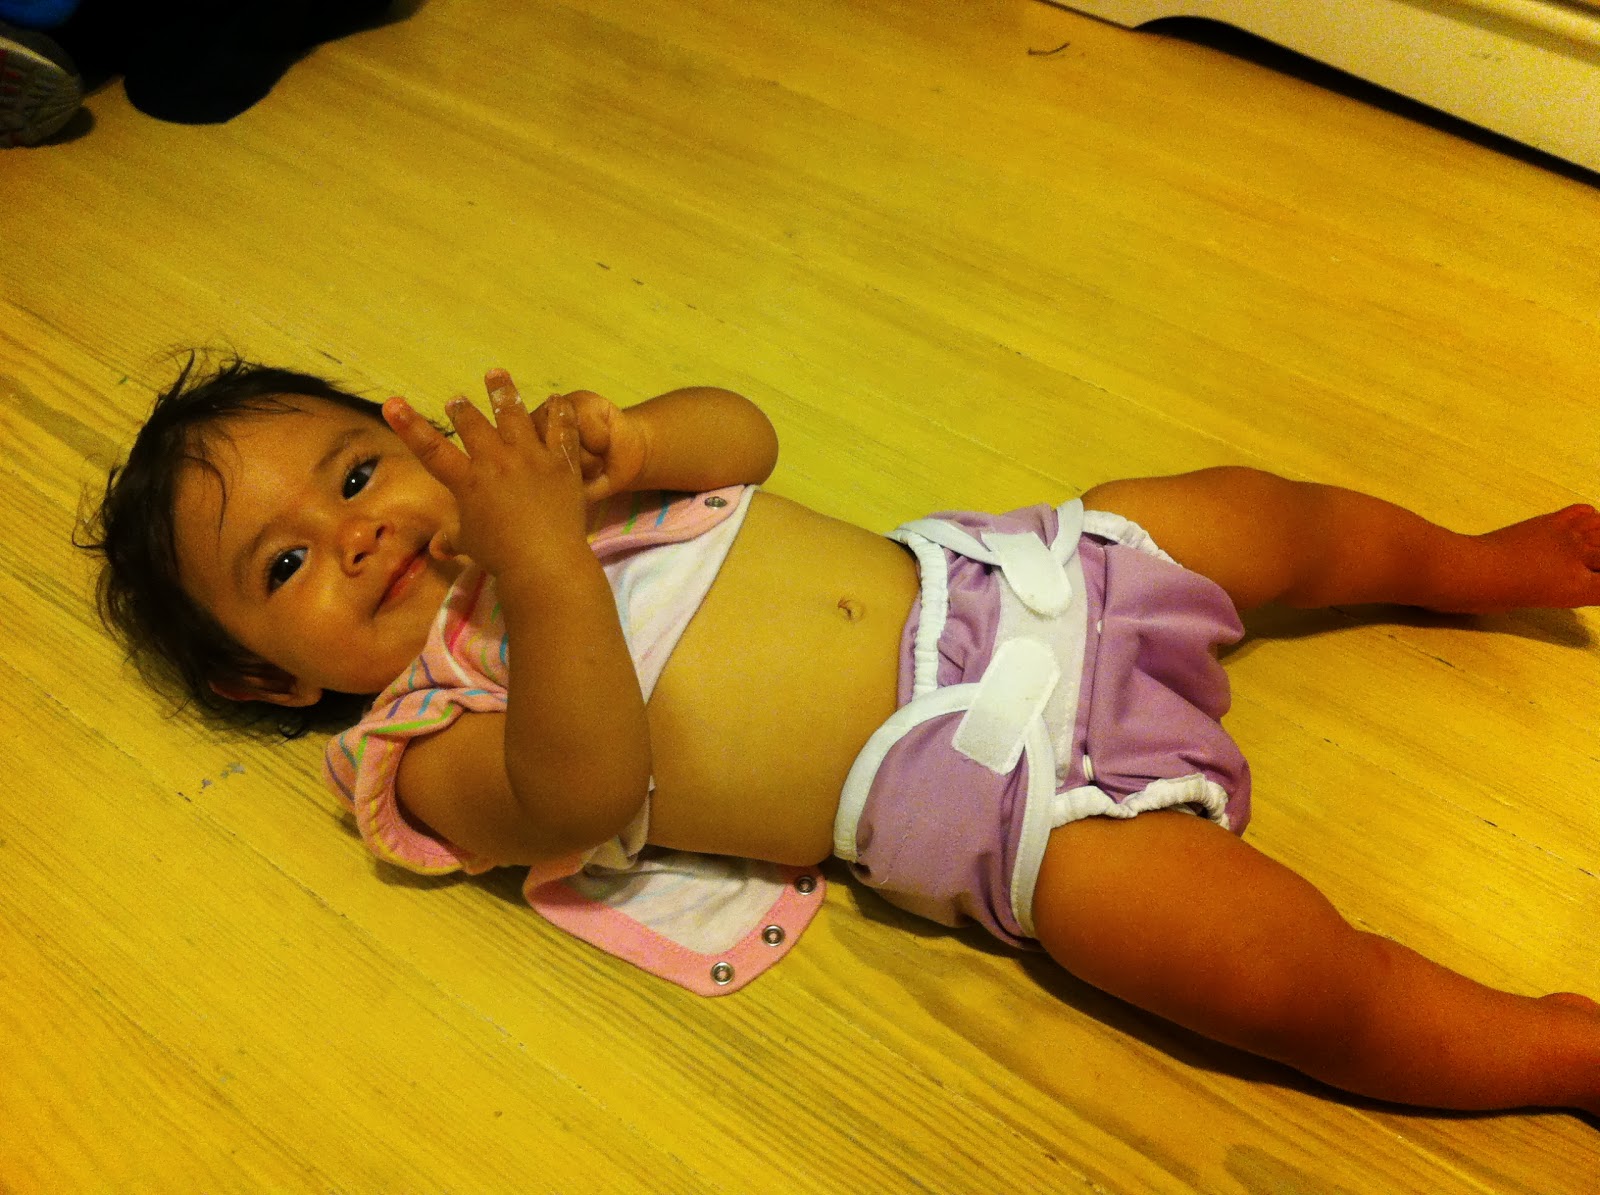
Ready for bed in her wool shorties.

Monday, June 3, 2013

How to Make Baby Food and Healthy Popsicles at the Same Time

It seems we've reached that bittersweet point when baby doesn't want mushy baby food anymore.  She'd rather eat what we're eating and enjoys feeding herself.  It's a wonderful beginning to her growing independence and development... but I did enjoy making fresh, healthy baby food.

One afternoon each week, while I prepared supper, I would also steam several vegetables and fruits to make baby foods.  Once soft and cooled, I would puree the vegetables and fruits (we use the Magic Bullet- it's the perfect size & gives a super smooth texture).  Some vegetables would turn out rather runny (especially corn), so adding rice or oatmeal single-grain infant cereal would thicken it up.  Some vegetables would turn out very thick (especially sweet potatoes), so adding a little apple sauce, pure juice or the reserved cooking water would achieve the perfect texture.  The pureed foods would then be transferred into our ice trays and put in the freezer overnight.  Once they were completely frozen, I'd pop out the little baby food cubes and throw them in freezer bags.  No need to have a separate bag for each blend- I just labeled the bags with colors like "Orange- Sweet Potato & Apple" "Green- Peas & Carrots" or "Purple- Blueberry, Pear & Rice".  It saved space in my freezer this way.  When it's time to feed baby, take out however many cubes you need, place them in a serving bowl, then place the serving bowl in a dish of warm water to thaw the food.  We also stored a day's worth of cubes in the refrigerator, so they'd be thawed and ready to serve.

Freezing and Storing the Homemade Baby Food

My favorite reasons for making these frozen baby food cubes is that babies just LOVE to chew on the cold food in a mesh teether.  It gives them eating independence, soothes a teething baby's gums, and occupies baby just long enough to give Mommy a quick break to wrap up supper!  They are also Incredibly Cheap to make compared to all the jars of baby food you'd have to buy!  Let's not forget these are super healthy and as fresh as you want them!  Use your own garden veggies & fruits, or fresh veggies from the market.  Avoid using store-bought canned fruits and vegetables to make your own baby food because so many of the nutrients have already been lost.  Fresh is best!

Get creative with your baby food combinations!  Increase your babies palate for a lifetime love of healthy foods!  Here's just a few of our regular favorites:
Carrot
Carrot-Apple
Carrot-Apple-Cinnamon
Pea
Pea-Carrot
Sweet Potato
Sweet Potato-Apple
Sweet Potato-Spiced Pear (from pears I canned with cinnamon sticks)
Lima Bean- Corn (Lima beans stay slightly chunky, better for older infant)
Corn-Rice Cereal
Green Bean
Blueberry-Banana-Fresh Squeezed Orange Juice-Rice Cereal
Peach-Apple
Banana-Oatmeal Cereal- Fresh Squeezed Orange Juice
Pear-Blueberry-Oatmeal Cereal
Apple
Apple- Cinnamon
Pumpkin-Apple
Squash
Squash-Carrot-Apple
Avocado-Pear
Watermelon-Rice Cereal

For older kiddos, just put the same pureed vegetable and fruits into Popsicle trays for healthy summer treats!  Jazz it up by adding yogurt or honey to the puree before freezing.  **Babies Under 12-18 months old CANNOT EAT HONEY**  Honey should only be added to the popsicles for older kids.  My pediatrician told us to avoid feeding baby strawberries until about 12 months old too.

Another option for any juicers out there- freeze your fresh, healthy juices in the ice cube trays for baby's mesh teether or for kid's popsicles!

Fresh, Healthy Juice - This gorgeous blend is Beet, Cucumber, Carrot,  and Pear.

I made about 95% of the baby food myself, but I always kept some store-bought baby food on hand, ready to go for the diaper bag.  Infant rooms in most daycares have refrigerators with freezers in the room.  You may be able to provide the daycare with a bag of the baby food cubes, along with a small bowl and spoon to serve from, instead of sending the store-bought baby food jars.

Friday, May 31, 2013

How to Make Cloth Baby Wipes and Foaming Hand Soap at the Same Time

Whether you use disposable diapers or cloth diapers, making and using your own cloth baby wipes is really easy, economical, and healthier for your baby's bottom (or nose, hands, face, high chair, mommy's hands, etc.... all the many things that need to be wiped with little ones around).  With 3 kids, I was going through packages of disposable wipes too quickly.  Using cloth wipes helped cut down that expense and gave us a wipe without all the nasty chemicals.  Just throw them in the hamper with the soiled cloth diaper & wash them together.  Even if you use disposable diapers, you could have a small bag at your diaper changing station to place the soiled cloth wipes in.  Then just wash them in hot water with a small amount (about 1/2 Tbsp for a medium load) of your regular laundry soap.


Making the Wipes:
Cutting up old T-shirts into wipe-sized squares can give you tons of wipes!  Using the packaged cheap baby bath wash cloths you find in department stores is an easy and effective option.  They have a smooth side, the textured terry side, and are the perfect size to fit into wipe containers.  I also love Birdseye cloth wipes.  They're thin enough to wash out very well, dry quickly, and have just the perfect texture for wiping messes (If a wipe is too smooth, like fleece, it just glides over the mess instead of picking it up).  I've bought some Birdseye wipes from Green Mountain Diapers and they are my favorite quality wipes.  If you are crafty at the sewing machine, wipes are easily made from any scraps of fabric sewn into approximately 8"x8" squares.


Folding the Wipes:
I like to fold my wipes in an interlocking style, just like disposable wipes, and place them inside an old empty wipe container.  They pop out of the box, easy to grab.
1. Lay out 2 wipes, overlapping halfway.
2. Fold the bottom wipe over the top one, into a rectangle shape.
3. The top one is folded over the edge of the other open wipe, into a rectangle.


4.  Lay the next wipe over folded wipe, lining up edges.
5.  Continue folding each wipe over the first until you get a full stack.
6.  Place into the empty wipes box.  Ready to use!

Wipe Solution Methods:
Most of the time, I like to pour my wipe solution over the wipes in the container so that they're ready to go.  Sometimes, however, I just keep the wipes dry in the container and use a squirt bottle with solution to wet each wipe before use.  This method just takes an extra step at each diaper change.  The dry method with a squirt bottle is best for diaper bags.  If wet wipes aren't used for a while, they will get funky.


Wipe Solution Recipe (and foaming hand soap!):

Ingredients for Cloth Wipe Solution and Foaming Hand Soap


The recipe I prefer for my wipe solution is as follows-
2 cups of filtered, clean water.
1 Tbsp. of Dr. Bonner's Pure-Castile Liquid Soap, in "Unscented Baby Mild"
1 Tbsp. of Glycerin
Several drops Essential Oil- Tea Tree or Lavender (Tea tree oil has natural antibacterial properties and smells great, so it's my regular choice.  Lavender is calming and relaxing, making it perfect for baby.)

I swish all these ingredients together in the cup of water, then pour it over the folded stack of wipes until they seem pretty damp.  Give the stack a little squeeze to remove excess water, and put them in the  empty wipe box.  Done!  Then I squeeze an extra small shot (about 1/2 Tbsp) of glycerin into the remaining solution and pour it into my foaming hand soap container & BAM!  Foaming Hand Soap, too!

Homemade Foaming Hand Soap


Tuesday, May 28, 2013

3rd Annual Flats and Handwashing Challenge: Day 7

The last day of the Flats & Handwashing diaper challenge was a busy one- working on our house and then a birthday party.  The next day was another busy one, working on the house and grilling hamburgers for Memorial Day (the first Memorial Day in several years that my sailor wasn't working)!  So I'm just getting around to writing about my experience finale.

Was using flat diapers and covers exclusively difficult?
Not at all.  We love flats!

Was hand washing diapers difficult?
No.  It just took a little extra time and elbow effort.

Was line drying diapers difficult?
No.  I don't have to blow the wind, so it was pretty easy and only required a few extra minutes to hang up and take down the diapers from the clothes line, drying rack, back of the dining room chair, or wherever I put them to dry.  

Was diapering with flats & covers, hand washing, and line drying expensive?
Absolutely NOT!  So unbelievably cheap!  This method and flat diapers will provide healthy & cheap diapers from birth till potty training, and still work for future babies!

So, why don't more economically challenged families use this method of diapering?!
Our society's values have changed over time, changed to incorporate constant ease and convenience, as well as a high desire to achieve "success".  The mothers of today's society have been exposed to the fact that disposable diapers are the norm and they are rarely even exposed to the option of cloth diapers.      Lessons in running an healthy, frugal & efficient household have been neglected by most of our mothers and grandmothers, by no fault of their own.  Even if they did try to give us such lessons, society has constantly pushed the opposite on us with fast foods, lavish homes, expensive clothes, pedicures, and gym memberships... as well as the need to acquire the time-consuming, prestigious jobs it requires to pay for all of it!  Making more money to pay for all of our stuff has become the most important thing for most people.  The goal of raising happy & healthy kids in a happy & healthy family environment has been lost in the struggle.  Using cloth diapers is just one of many ways for families to live within their means.

Will I stop using flats and hand washing now that the challenge is over?
No way!  I have loved using flat diapers for a long time now and I will continue to use them.  I have always line dried diapers fairly often and I'm currently line drying all of our laundry full time, until we move into our new house.  For hand washing, I will not continue to do this everyday.  I will, however, use this method when the need arises- camping, frequent hurricane-season power outages, or when my washer breaks (it's been making awful sounds lately, so I'm expecting it to break down any day).

I'm glad I was able to pay tribute to all those hard working mothers that hand wash diapers daily as part of their normal routine, and increase my appreciation of the modern luxury of the washing machine!!


Read more about this awesome diaper challenge here:
Dirty Diaper Laundry 3rd Annual Flats and Handwashing Challenge

Saturday, May 25, 2013

3rd Annual Flats and Handwashing Challenge: Day 6

Well, tomorrow is the last day of handwashing flats, and it's not even that exciting- using only flat diapers, hand washing and line drying them isn't that bad!

During my cloth diapering experience, I've found that pocket diapers are my favorite traveling diaper.     For this challenge, I was able to pre-stuffed pocket diapers with 2 flats pad-folded - it works really well.  No fiddling around, trying to re-stuff a cover, find the Snappi, etc.   Diapering on the go with 3 kids in tow needs to be quick and easy!

I've also recently grown to appreciate disposable liners for traveling purposes- when poopy diapers won't get cleaned until several hours later, liners make the job much more manageable.  Since I wasn't able to use disposable liners for this challenge, I used the fleece liners I made from cutting up a cheap fleece blanket.  That has worked well, especially since we are dealing with a stomach virus here and have plenty of dirty diapers!

I know my grandma is looking down from Heaven & she still probably thinks I'm crazy for using cloth diapers, especially flats...  But the truth is, it's not that hard & I love that we are using something reusable, healthy & CHEAP!


Read more about this awesome diaper challenge here:
Dirty Diaper Laundry 3rd Annual Flats and Handwashing Challenge

Friday, May 24, 2013

3rd Annual Flats and Handwashing Challenge: Day 5

So... a small stomach virus put a whole new twist on the diaper hand washing challenge!  The combination of a stomach virus and cloth diapers is always a chore, especially since I don't have a diaper sprayer at the toilet.... but when each diaper must be hand washed & dried- I think I just earned myself a glass of wine tonight!  She's already showing improvement, so I'm sure she'll be better soon.  It's always heartbreaking when the kiddos are sick.

Thus far during this challenge, I've found that cloth diapering with flats and covers, hand washing, and line drying works great- it just takes a little extra effort and time.  Nothing worthwhile comes easily, though.  I'm loving my Nellie's Laundry Soda for hand washing, and because it's non-toxic and biodegradable, I could use it while camping.  I've found that air drying these hand wrung diapers indoors leaves them stiff and rough, much more that line drying outdoors.  Plus, I prefer the faster drying time outdoors.  I do realize drying diapers outdoors isn't an option for a lot of people, and that's why I dried them indoors a few times.

I am looking forward to using my washing machine again.  I'll have to wait until we finish building our house to use a dryer again.  I sure do miss my big, fluffy bath towels.  Very soon, hopefully!


Drying diapers and regular laundry on this warm & breezy morning.


Read more about this awesome diaper challenge here:
Dirty Diaper Laundry 3rd Annual Flats and Handwashing Challenge

Thursday, May 23, 2013

3rd Annual Flats and Handwashing Challenge: Day 4

Today, we are asked to report on our handwashing experience thus far.  Like I said before, I've been using flats and line drying since forever.  Hand washing, however, was my challenge.  Overall, handwashing is a bit of a chore, but totally attainable.  I feel great about being able to efficiently hand wash our clothes and diapers since we live in South Texas, minutes from the Gulf of Mexico.  Hurricane season usually leaves us without power, often for hours or days at a time. 

Although I realize it's physically easier to wash only a few diapers at a time several times throughout the day, I just haven't had that kind of time to sit in the bathroom and hover over the diaper wash, leaving the kids somewhat unattended.  During a mere 1.5 minute potty break yesterday, I came out to find my nearly 3 year old literally fishing in our fish aquarium and my 4 year old had brought his bottle of mosquito larvae inside to make a habitat for them.  Not cool.  Not at all.  Therefore, I primarily wash my diapers early in the morning, and then let them sit in the bucket until it's time to take the kids outside to play.  We usually head outside about 10am, because by that time breakfast is over, dishes are washed, laundry work is under way, and we are ready for a break from the preschool work.


I've been using Nellie's Washing Soda for about 2 months now. It's been wonderful, but it's amazing now that I'm handwashing! That has to be why I've had such an easy time washing...
I place my 5 gallon bucket (camp-style washer) into my shower, add all the diapers and fill completely with hot water. I let them soak for about 2-3 minutes (while I brush my teeth).   I pour it all out and then add only a managable amount of diapers (about 5 diapers, a cover, and several wipes) and enough hot water to cover them completely. I use the plunger with holes drilled in it to aggitate the diapers for only about 1 minute. Then, I wring them dry, placing them aside as I go, and continue until all diapers are rinsed.   Pour out the rinse water.  I then place a managable amount of diapers into the bucket again, fill just over 3/4 full with hot water and add about 1/4tsp of Nellie's washing soda. I aggitate them for about 3 minutes with the plunger, wring them dry, and set them aside.  Wash the remaining diapers (usually another 5, plus a couple covers & wipes), and wring dry.  I then place all diapers back in the bucket, fill with hot water, aggitate for about 30 seconds or so.  Wring them all dry as hard as I can (yes, my hands are sore by now), and I'm done.  They smell and look completely clean.

Hand washing diapers using our camp-style washer in the shower.

I've also hand washed our overnight diapers like this and they turn out great too!  For overnight, I primarily use a small pad-folded flat or prefold placed inside a large prefold, fasten with a Snappi and cover with a wool or fleece soaker.  Another nighttime diaper I just recently tried & love is the KaWaii Good Night Heavy Wetter one-size pocket diaper.  There several thick microfiber terry inserts that go inside.  No leaks, keeps bottoms dry all night, and fits my baby and my nearly 3 year old!  I wish I had these for my oldest son- I would have saved so much money opposed to buying disposable pull-ups for nighttime!  I hand washed and line dried the prefolds and this KaWaii GNHW pocket diaper and it was great!  I'm totally impressed!

Line drying diapers outside.  Obviously, this is the preferred method.  Quicker drying time, sun bleaches any stains, and it doubles as outside play time.

Little G is always helping me.  This picture was taken a week or so before the challenge, hence the prefolds.
Ready for bed in her WAHM-made wool shorties over a Geffen Baby pad-folded hemp jersey flat,  laid in a prefold, & secured with a Snappi. 
Last night, however, I decided to wash a load of diapers before I took a shower.  I had planned on putting the whole accordion rack in the shower to drip, but then I realized I still needed to take a shower and the air circulation is terrible in the bathroom.  So I moved the rack under a ceiling fan, and placed a towel underneath to catch the water drippings.  By 6am, they were still damp, but by 8am, they were dry.  Outside, these hand washed diapers dry in about an hour (I live in windy, hot South Texas- the perfect place for drying clothes outside).
Line drying diapers inside.  The new fleece liners I made air dry in a snap!


Read more about this awesome diaper challenge here:
Dirty Diaper Laundry 3rd Annual Flats and Handwashing Challenge


Wednesday, May 22, 2013

3rd Annual Flats and Handwashing Challenge: Day 3

It's day three and the Flats and Handwashing challenge is going quite well.  I've been a fan of flat diapers for over a year, but hand washing was my challenge.  It's actually not too bad!  They wash out very easily in the camp-style washer we made.  A few months ago, I washed flats & line dried for two days in a hotel bathroom without this camp- style washer & it wasn't bad at all.  Tonight will be my first time drying hand washed diapers indoors.  Since I'm sure they'll be dripping wet, I plan on moving my accordion drying rack into the bathtub.

Line drying diapers with Little G.


I had a little fun with fleece!  I decided to cut up a cheap fleece blanket into stay-dry inserts to lay on top of Little G's diapers.  It was so easy to cut the fabric, no sewing needed.  It kept her bottom dry for nap time and made washing out poopies super easy too!  I also make a quick, cute little headband with scrap fleece.

A Flip one-size cover in Bubble, with a simple stay-dry liner made from a cheap fleece blanket.


A fleece headband, for fun.  I couldn't resist.

Read more about this awesome diaper challenge here:
Dirty Diaper Laundry 3rd Annual Flats and Handwashing Challenge

Tuesday, May 21, 2013

3rd Annual Flats and Handwashing Challenge: Day 2


Using flat diapers is truly easy and affordable.  I've tried several different flats and really love them all.  My favorites are the unbleached Clotheez flats from Green Mountain Diapers.   They are so durable and hold their shape very well.  Small is a perfect size.  The large is nice for origami folds on larger baby and pad folded fits perfect into a one-size cover opened up to largest rise.

Top to bottom:
1.  Geffen Baby- Hemp Jersey Flat diaper, 60% hemp/40% cotton.  Only comes in one size & it's fairly small, but on a small baby it's perfect.  Luxuriously soft and absorbent.  But it's $6.95 for one diaper.
2.  Green Mountain Diapers- Cloth-eez Birdseye Flat diaper, size small, 100% cotton.  My go-to diaper!  Holds a nearly perfect square shape, very durable, cleans so easily and dries the quickest!  $12.00 for 6, not a bad price at all.
3.  Hemp Babies- Flat Weeds.  55%hemp/45% organic cotton.  One size, it's a perfect size.  Only a single layer, but Very absorbent!  However it takes the longest to air dry and  the texture is a bit rougher than the others.  I love this flat for nap time, nighttime, or car rides.  $7.50 for one diaper.
4.  An Old Receiving Blanket-  100% cotton.  I have to say, this is a very soft, very absorbent, and very economical option for diapering!  If you don't have extras, check local resale shops!  Receiving blankets are just as awesome as my purchased flats!
5.  Green Mountain Diapers-  Cloth-eez Birdseye Flat diaper, unbleached in size large, 100% cotton.  Another go-to diaper, but too big before baby was 15 pounds.  $13.50 for 6, still a great price for a quality flat diaper.

I primarily pad fold my flats in Thirsties duo wrap covers or Flip covers because this option is quick and fits both my kiddos that use diapers.  (My baby girl is in diapers full time.  My 2nd son is potty training, so he uses diapers when we head to town, out for the day, at nap & nighttime).  These covers hand wash very easily and dry extremely quick, especially the Thirsties covers.  Flip covers really are one-size!  We have loved them from when baby was about 8 pounds to my toddler that's almost 3 years old and weighs 38 pounds!  I almost always add a cotton or hemp doubler inside the pad fold, but not for this challenge.  My other favorite fold is the origami fold, using a Snappi to secure and covering with Thirsties cover with snaps, fleece or wool covers.  Both fleece and wool covers at nighttime rock!  No leaks!  No wet sheets at 3am!  I've never tried the fancy expensive ones, but our WAHM made fleece and wool are so affordable, fit awesome and work great!

Thirsties Duo wrap, Size 2 in Ocean, with the Cloth-eez large flat.  Snap closure does not have the inner flap to tuck the pad-folded diaper into, but it still works great!  Thirsties have double gussets at the leg openings that prevent leaks.

Thirsties size 2 on my nearly 3 year old, 38 pound son, who still needs a diaper when we head out of the house.


Thirsties size 1 in Rose with aplix closure.  Aplix closure has an inner flap that's nice for pad-folded diapers.  


Thirsties size 2 in Orchid with aplix closure on the smallest rise setting.  She's only about 17 pounds.  Size 2 covers a really wide weight range.  

Flip one-size diaper cover in Blossom with a pad folded flat and a cloth-eez cotton doubler on top.   Flips have a flap for the diaper inserts to tuck into in both the front & back, but no double gusset.  I usually fold a doubler inside the flat, but occasionally add it at the last minute like this.


I'm also a fan of using cloth wipes.  For a long time I used the cheap Wal-Mart baby wash cloths and they work fabulous.  Also, cutting up one of my husband's old t-shirts gave me a bunch of cloth wipes that also double as diaper liners when using diaper rash cream.

Drying cloth wipes (& nursing pads) indoors.  These wipes are Green Mountain Diapers Birdseye 2-ply wipes.  Great quality,  perfect wiping texture from the Birdseye, extremely durable.  I don't like wipes to be too soft because they just slide right over the mess without cleaning it up!

For this Flats and Handwashing Challenge, my husband made me a camp-style washer.  For my first hand wash, I used the plunger without holes drilled and it worked fine.  However, with the holes in the plunger, the water really works thoroughly through the diapers and seems to clean better!  And less splashing!  We can really use this for camping and for hurricane season when we loose power.  I love it!!  Right now, I'm using Nellie's Laundry Soda and it works great.  It's biodegradable and non-toxic.

My 4 year old was curious and wanted to help wash.  He did a pretty awesome job!  This was the wash without holes drilled in the plunger.

Camp-style clothes washer with plunger.
Camp-style clothes washer with plunger.  Holes drilled into plunger makes water flow through clothes & cleans wonderfully!


Read more about this awesome challenge here:
Dirty Diaper Laundry 3rd Annual Flats and Handwashing Challenge

Speaking of dirty laundry...

For the last 30 days, I have not used a clothes dryer.  It's been another challenge for me, but so far I've managed much better than I expected.  It started out of necessity- our electricity went wacky after a lightening storm.  My husband tried to explain the problem to me, but it sounded like the grown-ups speaking on Peanuts (Sorry, babe).  Basically, we couldn't run our air conditioner or our clothes dryer.  Boo.  
Oddly enough, this is not unlike the situation which lead to our television-free home.  It's been well over two years since our we've had television programming and we don't feel we need it.  We do enjoy watching movies that we select during some of our free time, but regular television is no longer in our lives.  
So, I have always hung the occasional load of clothes to dry out on the clothes line.  Usually clothes would get hung indoors to avoid rain or dogs tearing down the clothes, but I've always enjoyed hanging the clothes outside.  So serene and peaceful to hang out a load of clothes, while a gentle breeze sweeps the stresses of the day away.....
Well, with a fairly dirty family of five and two using cloth diapers, housework without a clothes dryer meant a whole new routine.  Every single sock, panties, bras, nursing pads, diapers and doublers, thick jeans, bed sheets, bed sheets for potty training boys, more diapers, quilted comforters, bath towels, dish towels, face towels, socks, socks, socks......   (deep breath....)  Every piece of dirty laundry still has to be washed and dried- and now I have to physically hang it up and take it down, AND still fold it and put it away.  At any given moment, I usually have clothes drying in several rooms of the house because my small outside clothes line and rainy days make it difficult.  
I totally took the luxury of my clothes dryer for granted.  Being able to throw a load of clothes into the dryer and head to bed was SO nice.  I've grown to love hanging clothes out to dry much more than in the past, but as soon as I have a functioning dryer again, I will use it for whites (socks & sheets), towels & jeans.  My thick, fluffy towels are waiting patiently at the bottom of the shelf for now.

Thursday, April 25, 2013

Making Laundry Detergent

One of my most recent frugal efforts has been making our own laundry detergent.  It's really easy & usually done while watching a movie.  After making a batch a liquid detergent that I thoroughly disliked, I decided the powder form was for me.  The liquid detergent was gloppy & solidified to a hard gel after a while.  Even shaking the bottle didn't help.  The powder form is easier to make & stores much longer, even in our drafty, old house.

Homemade Laundry Detergent

Here's the recipe I use:

1.  Grate 1 laundry bar soap.  Felz Naptha works great for us.  I tried Zote, but it didn't seem to clean the clothes at all.  I read that you can use Ivory soap, but I haven't tried it yet.  I think choosing the base soap is a matter of trial & error.  Everyone has different water types and levels of dirtiness.  Our water is rather hard and all of our clothes tend to get pretty dirty by the of the day.  (Dirt, oil, grease, dirt, food, kids' paint, boogers, did I mention dirt yet??)

2. Place grated soap in a blender and add 1 1/2 cups of Arm & Hammer All-Natural Super Washing Soda & 1 cup of 20 Mule Team All-Natural Borax.  Blend it for about 30 seconds, until it's an evenly mixed fine powder.
I have an old blender that I no longer use for food, only for making the detergent.  The blending step could be skipped if you're concerned about possibly breathing in the borax.  I just try to be very careful, & never do it around the kids.  I like to blend it because it gives each scoop an even mix of all 3 ingredients.

3.  Then pour it into a container & you're done!  I store ours in an empty rice container with a lid and use an old scoop to measure.  I use 2 scoops (4 Tbsp), but like I said, our water is hard and our clothes are always really dirty.

The detergent WILL NOT make lots of suds/bubbles in washer & it's not supposed to.  It works great on all our clothes, even my husband's really dirty clothes and my baby girl's clothes.

One thing I'm wondering about though.....
We use cloth diapers and using borax on them is a big No-No.  Supposedly it wears the cotton & hemp fabrics down really bad.  For the diapers, we use different diaper-safe soaps, like Bum Genius diaper detergent, Rockin' Green Hard Rock soap, and Nellie's All-Natural Laundry Soda.
If borax is bad for the cotton/hemp diapers, is it not bad for the cotton clothes?  I've been using our homemade laundry detergent consistently for about 5 months now and haven't had a problem.  Has anyone had any problems using borax on regular clothes??